


K15 Pro Beginner’s Guide: From Unboxing to Your First Successful Engraving
Beginner Notice | Please Read Before First Use
- Please read this guide carefully before first use: Following the steps can help avoid over 90% of common beginner issues.
- Always adjust the engraving focus correctly: Incorrect focus is the main cause of blurry engraving or incomplete cuts.
- Beginners should use recommended parameters: Avoid changing power and speed settings at the beginning.
- Use the “Preview” function before engraving: Make sure the engraving area is within the material.
- Do not leave the machine unattended while engraving: Continuous supervision is recommended for safety.
- Ensure good ventilation: Laser engraving produces smoke; proper ventilation is required.
If this is your first time using a laser engraver, there’s no need to worry. This guide will walk you step by step through the complete workflow of the K15 Pro Laser Engraver, allowing even complete beginners to successfully finish their first engraving.
From unboxing to completing your first project, the entire process usually takes about 30 minutes.
Next, we will guide you through a hands-on example to complete your first beginner project with the K15 Pro.
If you are new to laser engraving, this guide will take you from zero experience to a full understanding of how to use the K15 Pro Laser Engraver.
Even if you have never used engraving software, adjusted parameters, or assembled machinery before, you can follow these steps and complete your first laser engraving successfully.
From unboxing to finishing your first project, the entire process usually takes around 30 minutes.
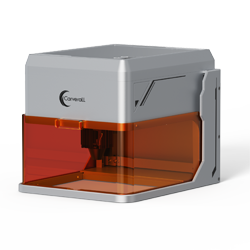
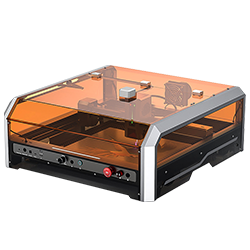
Step 1: Unboxing and Assembly
The K15 Pro is designed with beginners in mind. Most core components are pre-assembled, allowing you to start using the machine after only a simple assembly process.
- Open the package and remove the machine and all accessories
- Assemble the main structure according to the instructions (Tip: Pay attention to the orientation of each part)
- Check that the power cable and data cable are securely connected
- Assembly video reference:https://youtu.be/jm2yfijybLs
For most users, the complete assembly takes approximately 10–15 minutes.

Step 2: Download and Install CutLabX Software
The K15 Pro uses CutLabX as its control software and supports both mobile and computer operation. Both options offer the same functionality, allowing beginners to choose based on preference.
Option 1: Mobile Operation (WiFi Connection)
- Power on the K15 Pro
- Connect your phone to the machine WiFi: Carverall K15Pro
- Open the CutLabX mobile app
- Enter and connect to the machine IP address: 192.168.0.1
- Once connected, you can begin creating
- Operation video reference: https://youtu.be/H7FL8eJ37BU
This method requires no data cable and is ideal for quick engravings or simple projects.
Option 2: Computer Operation (USB Connection)
- Connect the computer to the K15 Pro using a USB cable
- Open the CutLabX desktop software
- No additional configuration is required for computer operation
Computer operation is recommended for complex designs, large files, or long engraving sessions.

Step 3: Import Engraving Images or Cutting Files
After successfully connecting to the device, you can import files into CutLabX for engraving or cutting. The process is intuitive and requires no design background.
Supported file formats include:
- JPG / PNG (for image and grayscale engraving)
- SVG / DXF (for outline cutting and vector files)
You can use photos, text, logos, or ready-made vector files downloaded from the internet.

Step 4: Adjust the Engraving Focus (Very Important)
Correct focus directly affects engraving clarity and cutting performance. Most engraving quality issues are caused by incorrect focus adjustment.
- Place the material flat on the working area
- Locate the focus block on the right side of the laser head
- Rotate it downward 90° to loosen the laser head for vertical movement
- Lower the laser head until the focus block just touches the material surface
- Secure the laser head and rotate the focus block back up 90°
- Ensure the laser head is perpendicular to the material surface
Once the focus is set correctly, engraving lines will appear sharper and details will improve significantly.

Step 5: Set Engraving Parameters
CutLabX provides recommended parameters for beginners. New users can directly use the values listed in the manual without complex calculations.
- Power: Controls laser output strength
- Speed: Controls laser movement speed
- Passes: Number of engraving or cutting repetitions
Beginners are advised to start with recommended parameters and fine-tune them later as experience grows.

Step 6: Start Engraving and Complete Your Project
Adjust the size and position of the design to ensure it fits within the material. Click Preview to confirm the engraving area is correctly positioned.
After confirming all settings, click Start. The K15 Pro will automatically execute the engraving task.
Within a few minutes, your first laser engraving project will be complete. Congratulations—you’ve successfully completed your first 0-to-1 laser engraving experience.


0 comments